Part 2 - Folder Structure & App Configuration
Lesson 1: Initialization
Creating App Folder Structure
Step One of creating a shiny new Juicebox app is creating your initial application folder structure. By using JBCLI, you can accomplish this without any fuss or guesswork. JBCLI lets you run basic JB commands, such as creating
new apps, or adding existing ones. You can find a list of JBCLI commands
by typing jb --help in the terminal.
Tip
Juice Commands provide a number of useful tools for managing your Juicebox app, though they may not be necessary during the course of this tutorial.
Your turn
- 1. In a terminal window, navigate to your Devlandia folder:
$ cd devlandia- 2. Activate the devlandia virtual environment:
$ workon devlandia- 3. Start Juicebox
$ jb start- 4. In a new terminal window, start Yo Juicebox and choose ‘Add an App’:
$ yo juicebox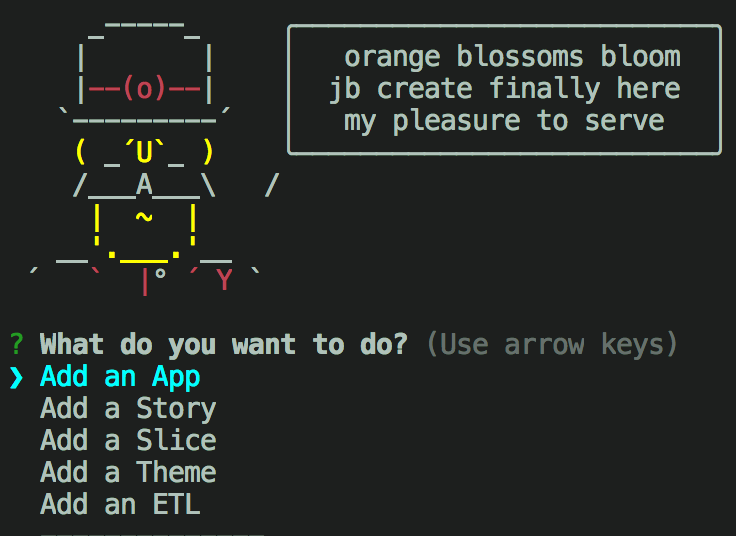
- 5. Add your app slug:
- Yo Juicebox will ask you for the slug of your app. You can use
[yourname]_nfl- 6. Create a GitHub repo for your application.
- Yo Juicebox will give you a Slack command. Pass this along to a Juice developer to execute.
- 7. Yo Juicebox will ask a few more questions before building out boilerplate application files/directories.
- Here are some values you’ll need:
- Name: NFL Contracts
- Description: An interactive exploration of NFL contract data.
- Primary color: #D50A0A
- Secondary color: #B4B4B4
- Story type: Juicebox 3
- Story slug: nfl
- Story label: NFL Contracts
- Story description: (You can leave this blank)
This will create the appropriate file/folder structure for the project and commit it to the repo that is named for your project. It also loads the app onto your devlandia juicebox.
The default folder structure for new apps looks like this:
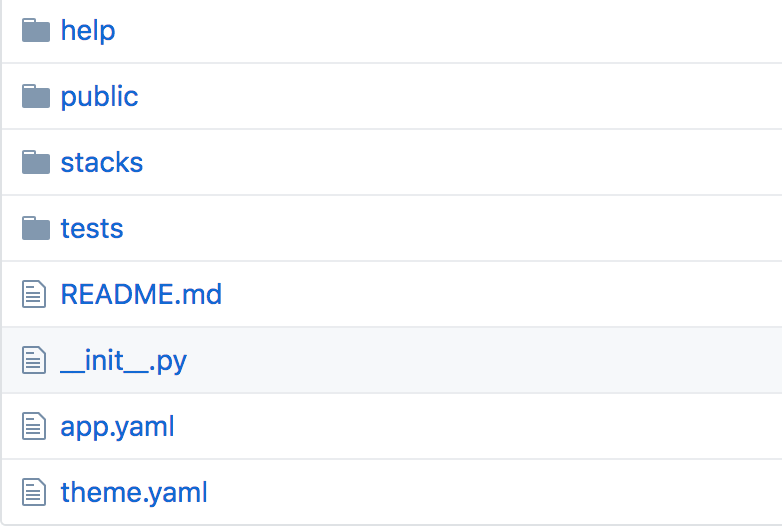
- help
- The online help files hosted with the app
- public
- Images, patterns, and backgrounds
- stacks
- Where the data services, configuration and templates live for each stack
- tests
- Directory for Gabbi tests (This won’t be used within this tutorial)
stacks
All of the code for each stack in our application will live in the stacks directory. This is where you will do most
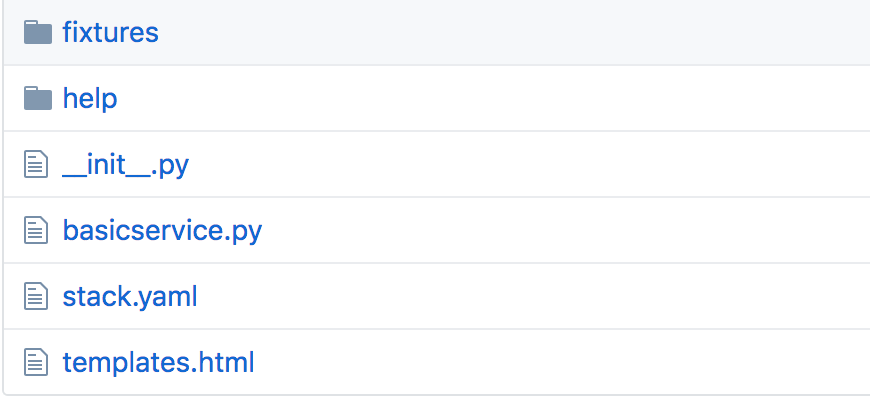
of your work. Below is the default structure for the default stack that comes
with each app (yourname_nfl/stacks/basic):
- basicservice.py
- The initial data service file, which we will break into 3 files later on.
- stack.yaml
- The configuration file for the stack.
- templates.html
- The location of any templates we use to customize how things look on the front end of each of our slices.
Lesson 2: Configuration
App Configuration
The first step to building an app is defining its configuration. We do this in
a file called app.yaml. YAML is an easy language
to define easily human readable variables that are also easily parsed by a variety of programming languages.
app.yaml
Here is an example of the app.yaml from a Juicebox app about census data:
1 2 3 4 5 6 7 8 9 10 11 12 13 14 15 16 17 18 19 20 21 22 23 | id: "zylTKNVx" # Slug appears in the url for the stack like # http://www.juiceboxdata.com/{appslug}/{stackslug}/ slug: "datademo" # Label is the displayed name of this app and appears on the home page. label: "Data Services Demo" # Description of this app, appears below the label on the home page. description: "US Census Bureau data services demo" # If true, this will enable the discussions feature in this app use_discussions: false # discussions_group_property is a property of user.extra that groups # who users can talk to in discussions # If blank, everyone with access to the app can discuss together. # WARNING: IF YOU CHANGE THIS IT MAY AFFECT WHAT DISCUSSIONS A # USER IS FOLLOWING discussions_group_property: "" # If true, show help button and allow access to help page. show_help: false juicebox_version: '3' # A list of stacks in this app, should be a folder in the # stacks/ directory in this app stacks: - "census" |
Writing YAML is straightforward can be quite powerful (a combo that we really like). Just define a key and value, separated by a colon.
Notice that the value of stacks (line 20) is a little different from the other values. In YAML, lists can be defined to contain multiple values. In this example, stacks contains a single item; as you may expect, YAML lists can contain an arbitrary number of items.
YAML is very flexible and you can do a lot more with it than we see here in the simple example.
Your turn
- Fire up your favorite IDE and find your NFL app directory.
- Open up the file
stack.yaml
- In app.yaml, define the appropriate values using the example above as a reference.
- To see more, you can view the full list of app.yaml options.
Hint
- You can set
use_discussionsandshow_helptofalse. - We will only have one stack named
nfl.
Stack Configuration
As mentioned earlier, a Juicebox app is comprised of one or more stacks. Each stack, in turn, contains one or more slices.
For every stack in an application, Juicebox reads what slices are being used and how they should function in the stack.yaml. file, along with other stack-specific configuration. There is one of these files for every stack in an application.
stack.yaml
Here is an example of a stack.yaml from the Juicebox app about census data that we have been referencing:
1 2 3 4 5 6 7 8 9 10 11 12 13 14 15 16 17 18 19 20 21 22 23 24 25 26 27 28 29 30 31 32 33 34 35 36 37 38 39 40 41 42 43 44 45 46 47 48 49 50 51 52 53 54 55 56 57 58 59 60 61 62 63 64 65 66 67 68 69 70 71 72 73 74 75 | # Label is the displayed name of this stack label: "Census" # Should a tour be displayed? has_tour: false # A default hash to use on application load # This enables certain selections to be made initially # If you leave this blank, the slices will start with no selections initial_hash: "" # Provides data to the global filters # Can be either a data service class in your service.py file # (e.g. 'realtorservice.FilterService') # or a json file in the fixtures directory (e.g. 'filters.json') global_filters_service: "censusv2_services.FilterService" header: - image: 'http://www.bannersbystats.com/mmkcart/images/lightblue.jpg' config: w: 2200 flip: h background: - image: 'http://cdn.pcwallart.com/images/light-blue-background-wallpaper-1.jpg' extra: "0 250px" config: w: 2500 slices: # Slice documentation: http://docs.juiceboxdata.com/projects/juicebox/topics/juicebox_reference/slices/index.html - slice_type: "option-chooser" # The title line for the slice. title: "Explore your data" # Detailed configuration for the slice. config: maxSelections: 1 minSelections: 1 optionExtraClass: "option-item-fixed-width" optionTemplate: |- <div data-id="<%=datum.id%>" class="group-container__item"> <div class="group-container__item__label"> <%= datum.label %> </div> <div class="group-container__item__value"> <%= datum.format('value', null, 'id') %> </div> </div> showTitles: false # Provides data to the slice # Can be either a data service class in your service.py file # (e.g. 'realtorservice.RankedListService') # or a json file in the fixtures directory (e.g. 'rankedlist.json') data_service: "censusv2_services.KeyMetricsService" - slice_type: "ranked-list" title: "Let's compare <%= optionchooser.selectionDisplay() %>" config: min_value: 0 data_service: "censusv2_services.RankedListService" - slice_type: "distribution" slug: "distribution_withorder" title: "Distributions can be put in a specific order and can show groups with no data" config: cellTemplateName: "#distribution-template" cellSizeRange: [ [200, 40] ] data_service: "censusv2_services.DistributionService" - slice_type: "card" slug: "pop_card" title: "Population change by state" config: sortFields: - default: "true" field: "state" label: "State" sortDirection: "ascending" cardTemplateName: "#jam-card-template" data_service: "censusv2_services.CardV3Service2" |
The code example above highlights the configuration values being set (i.e. label, has_tour, initial_hash, etc). stack.yaml lets you define slice backgrounds, titles, options specific to the slice type, and the endpoint where the data services are available.
The slices option (line 25) is where you define the slices you want to include
in the current stack. In the example above, there are four slices defined:
- Option Chooser (line 27)
- Ranked List v2 (line 51)
- Distribution (line 57)
- Card Slice (line 65)
Your Turn
- Define stack.yaml for the NFL app using the example above.
- See our Slice docs for more information about configuring slices.
Hint
- Here are some values you may need:
label= NFL Contractshas_tour= falseinitial_hash= ‘’ (Empty string)
Look at the mockup of the NFL app back in Part 1 - Getting to know Juicebox to define the slices. Remember we have a free-form slice, an option-chooser slice, distribution slice, and card-slice. Don’t worry about styling at this point. If you miss anything, you can add it later when you need it.
Next stop, Part 3 - Building Data Services!